

Looking for craft ideas for a pre-teen is quite a challenge, especially in our house where the eleven-year-old doesn’t seem to have an interest in anything but her phone, and lately Harry Potter. She does however have an interest in geology/petrology and loved her National Geographic Gemstone Dig Kit and is always picking up stones and small rocks from somewhere. When she was asked if she wanted to try out the Science MAD! Rock Tumbler, after finding out what it did, she was excited to give it a go.
So what is a rock tumbler? The short answer is that is a device that transform rough rock and stones into polished stones and pebbles. It is not a short process and can take a little as a week up to two months to complete the process depending on the type of rocks you are using and what level of finish you want.
As I said, we received the Science MAD! Rock Tumbler. It is suitable for children aged 10 years + (although I would say probably 8-12 years old) and comes with nearly everything that you need to turn unpolished rocks into refined semi-precious gemstones that can be used to make your own jewellery.
In the box:
- Rock Tumbler
- AC Mains Adaptor
- 100g Bag of Rough Agate Rock
- 100g Bag of Rough Jasper Rock
- 100g Bag of Rough Amethyst Rock
- Bag of Polishing Powder
- 1 Keyring (To hold stones)
- 2 Ring Mounts (To hold polished stones)
- Instruction Manual
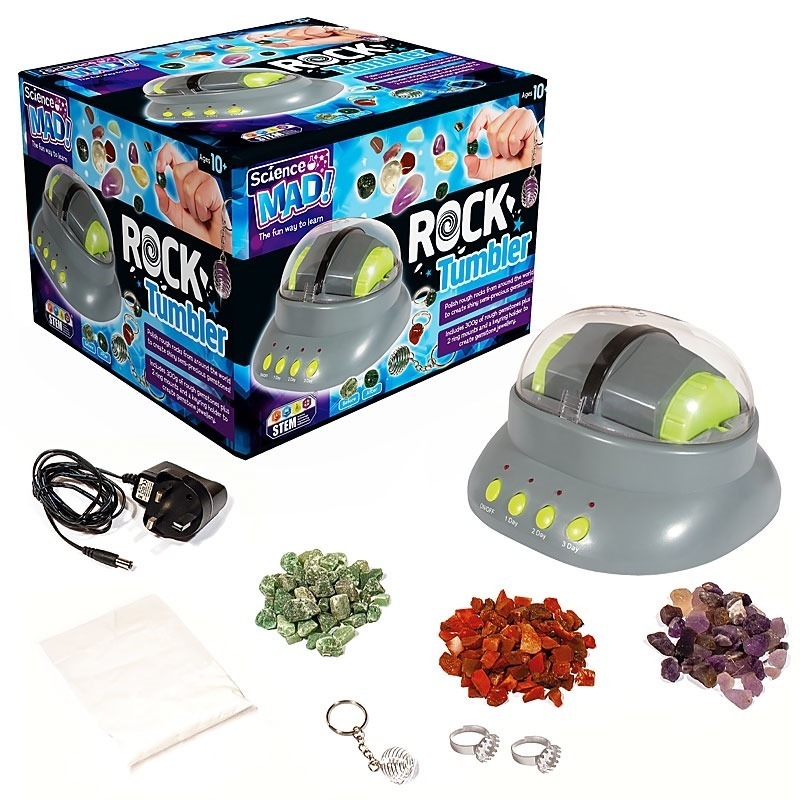
The Rock Tumbler requires no batteries but does require power, so it is supplied with a AC mains adapter. It comes with everything needed to turn small rough rocks into polished, smooth stones / semi-precious gemstones. To make the jewellery (rings) you will need to purchase some craft glue.
We had never used a rock tumbler or polisher before so we read the manual (you should always read the manuals, even if you think you know what you are doing!). The instruction manual is only eight pages long but contains all the safety and usage guidance that you need to operate it properly, including cleaning of the unit and first aid. The instructions in the manual are easy to read and follow.
Once we were familiar with the operating and care instructions, we were ready to start. It is not a short process and depending on if you just want a result of polished rocks or want to make jewellery using them the process is completed in 3 to 4 stages and takes several weeks.
As you will know, rocks are sharp, and the process of Stage 1 is to smooth out the sharp points and rough edges. This first process can take a little as two days and as much as up to a week depending on the size, hardness and roughness of the stone you are using. We decided to use the Amethyst Rock as the end result was going to be to make a ring and a keyring and felt the amethyst would be best for this, but we didn’t have enough weight of just these so used a mixture of all three bags of rocks.
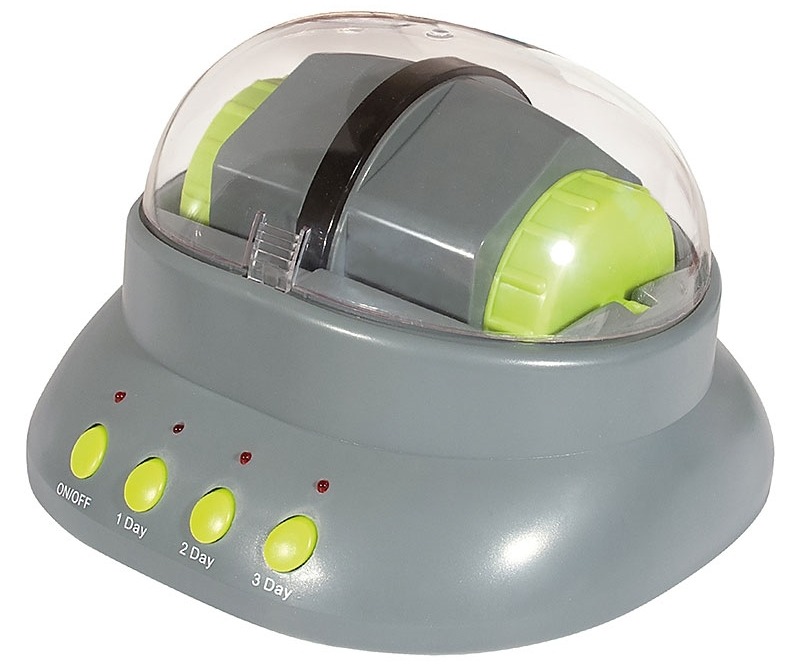
Firstly, we weighed out some of the small rocks. The manual suggests an optimum weight of 226g, maximum weight is 452g. We rinsed them in the sink to clear them of any dust and detritus. Once cleaned, we placed them in the barrel of the rock tumbler (the lid of the barrel unscrews). Then we covered the rocks with water, just enough to cover over the tops of the rocks and not filling the barrel. We screwed the lid back on and placed back into the rock tumbler and placed the clear plastic cover onto the tumbler, covering the barrel (it locks into place). We then plugged it in and pressed the green ON button. Now there was a choice to be made, to start the tumbling you need to decide how many days to run for. We decided that as we had a mixture of rocks we would use the highest setting of 3 DAYS so pushed the green button labelled 3 Day. This started the process of tumbling rocks and as you can imagine rocks rolling around in a barrel can be quite loud so we turned it off and relocated the rock tumbler into the garage and restarted the 3 day tumble (I would suggest not using in a bedroom or room you use a lot if you can). During this process it is recommended that you periodically check on the rocks to see how they are coming along, once or twice a day is enough.
When the 3 days were up, we felt that some of the rocks were still a little sharp so ran the process for another day. When completed we moved on to the next stage which continues to smooth the rocks and starts the polishing process. This took six or seven days to complete and involves emptying the water (through a strainer so that all the grit is not going down the plughole), rinsing the stones and refilling the barrel with clean water. The water will look extremely dirty during this process, it looked like chocolate milk. This process should run until the stones start to look shiny, checking on the progress every day.
Once stage 2 was completed, we again emptied the dirty water from the barrel, rinsed the stones clean and refilled the barrel with the sufficient amount of water. We ran the tumbling process again for about 2 hours to remove any last straggling bits of grit and then rinsed the stones and barrel again.
The next step is slightly different from the previous two stages. The barrel needs to be emptied again, stones rinsed and the barrel then filled with water again to cover the stones. This time the bag of polishing powder is added. Then run the tumbler again for at least 3 days, checking daily on the progress.
After a minimum of 3 days (ours took 4 days for us to be completely happy with them) the rocks should be looking smooth and polished. We had an old polishing cloth and used this to further polish the rocks that were to be used in the jewellery making.
Now that our rocks were nicely smoothed off and polished we were ready to start creating our jewellery. We were making a ring and a keyring.
For the ring mount you need to glue the rock into place using craft glue (not supplied). This is a simple process of putting some glue on the rock and the ring mount, pressing into place and using a bit of tape to hold together overnight. Give it 24 hours and the rock is set in place giving you some nice shiny costume jewellery. For the keyring, you just place your rock in it and add it to your keys.
Overall, despite being a long (and loud) process, our young tester really enjoyed this activity. She enjoyed watching the transformation of rough sharp rocks into smooth, shiny stones that she could use in her craft activities and with there being lots of rocks in each bag supplied, they will last quite a while. The stones can be used in all sorts of craft activities from jewellery making to decorating boxes, glassware and bowls.
It is also an excellent STEM activity for anybody with an interest in geology and science as well as crafters. It is great for teaching how water and sand over rocks can smooth, polish and even create structures over a period of time.
Everything you need to get you started is included in the box and the instructions were clear and easy to understand, especially for an 11-year-old.
The tumbler worked well, and the rocks do come out nicely finished, although I would definitely recommend using it in a garage, shed or least used room if you can as it can be quite noisy and quite frankly annoying listening to it.
The Science MAD! Rock Tumbler is a good craft activity for children that have an interest in rocks, rock polishing and jewellery making. It is a long process so would be no good for anybody with a short attention span or very little patience, but the outcome is worth the wait.
Whilst there are a lot of rocks supplied you can always purchase more, or even go for a walk and see what you can find. It only comes with one bag of polishing powder so you will have to purchase more for future projects.
You can see a video from Trends UK of the Science Mad Rock Tumbler in action here.
Rating: 4.5/5
RRP: £39.99
Available to buy from Amazon.


