

It’s so easy at the moment to only focus on home learning, and having fun at home really does seem to be falling by the wayside a little. Parents are exhausted after a day of trying to juggle home schooling with their own work, or in many cases, are doing their own work from home after 3pm when the kids don’t need to use the laptop anymore. It’s not great for anyone, and home really should be a place for us all to relax and enjoy as well.
One of the best ways of making learning fun is to try to incorporate play and practical tasks into lessons, and we find that it helps to make the day go better too as something to break up the screen-time helps everyone’s mood. My youngest is learning about states of matter at the moment: solids, liquids, melting and setting, which is one of the science topics that can lend itself particularly well to practical sessions. We were lucky enough to be sent the Chocolate Lolly Maker and Chocolate Golden Coin Maker to review from John Adams recently, and we decided to use it as an opportunity to look at how heat and chilling changed the chocolate (and makes some tasty treats too!). The girls are 8 and 11, and whilst we thought the youngest would be the one who would really want to try them out, the eldest couldn’t wait to get her mitts on them either, so we were really pleased that it appealed to a wider age range. Both sets are suitable for ages 6+.
The products came in bright, attractive boxes which made the sets look really appealing and fun. The boxes contained:

Chocolate Lolly Maker
Lolly Wrapper Unit
4x Lolly Moulds (smiley, swirl, heart, star)
2x Lolly Mould Holders
8x Message Moulds
Chocolate Melter
Spoon and Stirrer
Re-useable Lolly Sticks
Bags for Wrapping
Ribbon
Chocolate Coin Maker
Golden Coin Maker
Chocolate Melter
Coin Moulds (bases, lids and rings)
Stirring / Spreading Tool
6x Double Sided Embossing Discs
Golden Net Bags and Thread
Golden Foil Sheets
Both sets needed minimal setting up, and getting them ready to use took a couple of minutes at most. The only things that you need that aren’t included in the box are hot water for melting, and the chocolate itself. We used chocolate buttons rather than blocks as the chocolate was then ready broken up into small pieces that would be easier for melting.
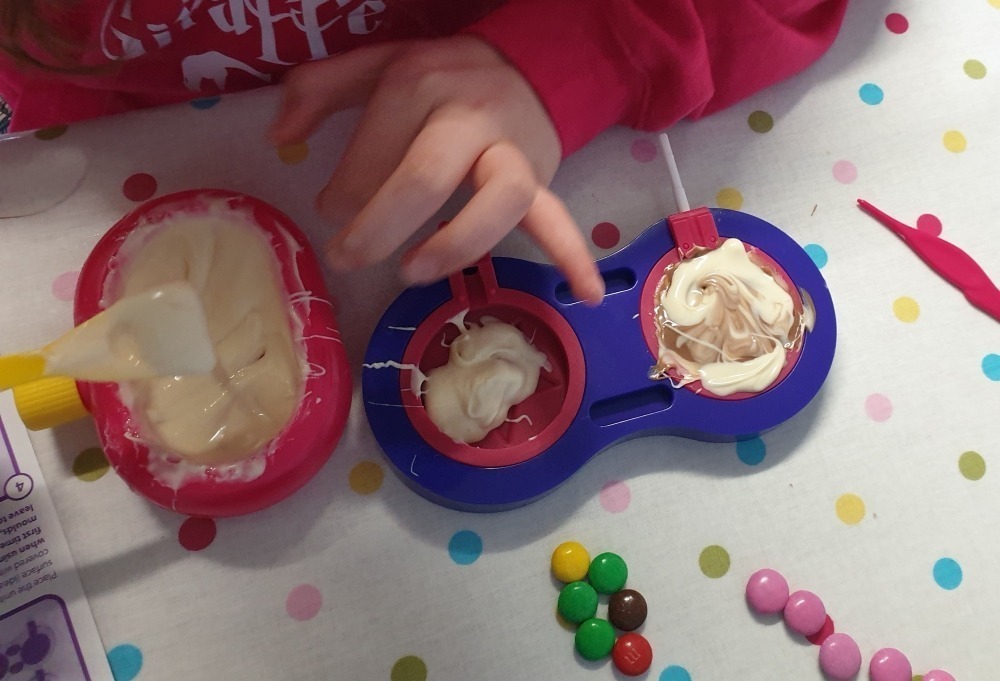
Once you have the machines set up, you need to get started with melting the chocolate. The chocolate melters that come with the set are small, double-skinned bowl-shaped bottles that are filled with hot water. The chocolate pieces are then placed into the bowl part and the heat of the water melts the chocolate. There is no need to set up a bain-marie on the hob, and no need to use a microwave. My youngest particularly enjoyed stirring the buttons whilst they melted, and the five or so minutes that it took gave us the opportunity to talk about heat melting the chocolate and how warm hands also make chocolate sticky and melted!
Once the chocolate was melted, the girls started working more independently; the eldest chose the Golden Coin Maker and the youngest wanted to try out the Chocolate Lolly Maker. We’ll look at the lolly maker first.
Chocolate Lolly Maker
We found the instructions that came with the lolly maker were really good. The individual steps were written in concise, simple terms and each one was accompanied by a clear photograph too, so my daughter was able to work pretty independently to follow the instructions and make the lollies. Making the lollies is a really simple process, thanks to the silicone moulds and the fact that the kit comes with everything that you will need.
After the chocolate is melted, my daughter chose which moulds she wanted to use, popped them into the rigid mould holder and inserted the re-usable plastic lolly sticks into the base. From there, she needed to spoon her white chocolate into the moulds and make sure her surface was as flat as possible. We then put the moulds into the fridge for 10 minutes to partially set so that we could use the message stampers to stamp a message onto the back of the lollies, before putting them back into the fridge for a further half an hour to fully set.
Whilst this first set of lollies was setting, she set to work with her other two moulds, except this time she got a bit adventurous and added smarties and some of the milk chocolate from her sisters melting pot into her moulds, to make some fancier lollies.
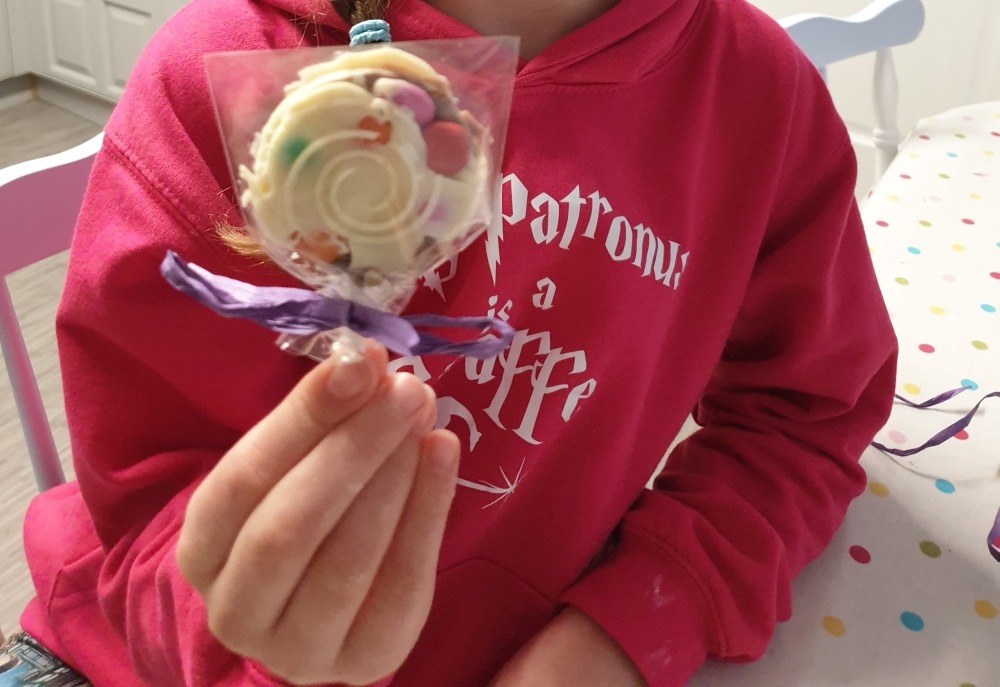
Once her lollies had set, we turned them out of the moulds (which was really easy because of the pliable, silicone material) and admired them. They looked fantastic and we were really impressed with how well the design of the moulds had transferred to the finished product. The final step was to use the lolly wrapper unit to add the wrapper. My daughter needed a little help with this bit, but it was pretty simple and we were able to get cellophane wrappers and purple bows tied around the lollies in no time. They looked absolutely fantastic and my daughter was incredible proud of what she had made.
Golden Coin Maker
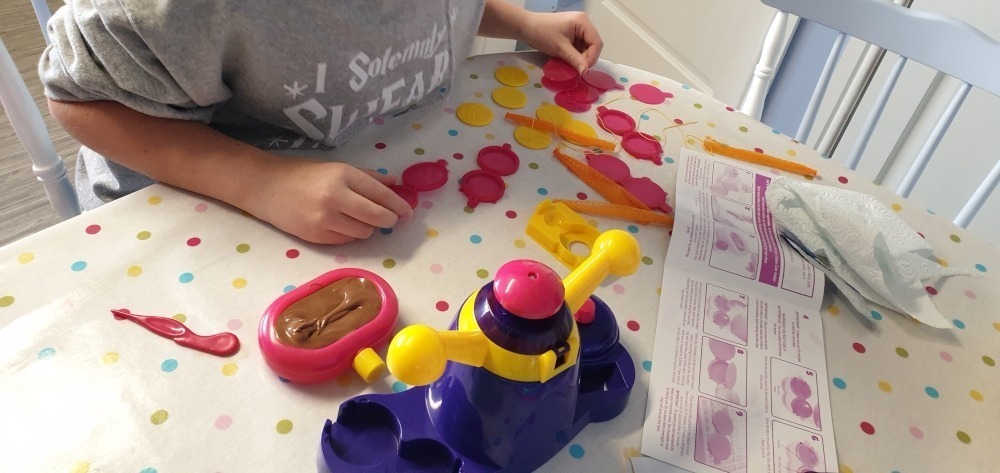
My eldest plumped for the Golden Coin Maker as she loves the chocolate coins that she finds in her Christmas stocking each year. The first step is the same as the lolly maker, in that you need to melt the chocolate and get the machine set up, which again takes about five minutes.
We found the process of making the coins to be somewhat more involved that the lollies, and there were more steps to go through. The instructions were set out in a similar way, and had photographs to match the step by step guide.
The first step is to assemble the moulds (base, moulds, mould ring and, at the end, top). Once this is done, the melted chocolate is spooned into the mould and any air should be knocked out to ensure a perfect, flat disc is made. Once this is done, the moulding lid is set on top and the chocolate is placed in the fridge for about 20 minutes.
Whilst the chocolate is setting, you can use the Golden Coin Maker base unit to cut the golden foil into discs ready for encasing the coins; each coin will take 2 disks. Three sheets of foil are included in the set, but once you have used all of these, silver kitchen foil can be used instead. Once the chocolate has set in the moulds, you can remove it from the fridge. At this point, the lid is removed and you are left with chocolate discs sat inside the moulding rings. A golden disc is then placed in the top of the base unit and the chocolate disc, still inside the ring is placed on top. The lid is closed and pressure is put on the top until it makes a ‘clunk-clunk’ sound. When you lift the lid and remove the coin (still inside the ring), you will see that half of the coin is wrapped in foil. The process is then repeated for the second side, and you are left with a wrapped coin.
The last step is to choose an embossing disc and place the coin and disc into the embossing drawer the bottom of the unit. The arm is twisted six times and when the coin is removed from the drawer, the pattern from the disc is embossed into the foil.
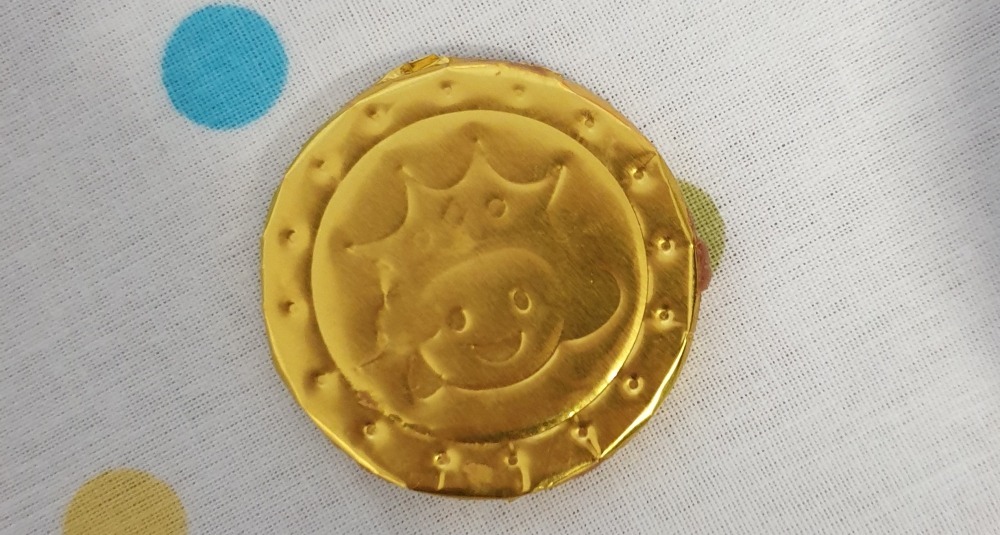
Whilst my daughter did enjoy this set, it was definitely more fiddly than the lolly maker, and it required more effort to get a smaller product at the end. That being said, she did enjoy it and was really pleased with the end result. I would probably suggest that younger children would prefer the lolly maker, and that the coin maker would be a better choice for slightly older children (probably 8+).
We had a lovely afternoon trying out these sets, and it gave us a much-needed break from the more screen-based learning that we had been doing. It provided us with a great opportunity to talk about the heat melting the chocolate, and the cool of the fridge setting the chocolate. My youngest has even written a small ‘recipe guide’ as part of her home schooling too.
We would rate the Lolly Maker 5/5 and the Golden Coin Maker 4/5.
RRP: £21.99 each
For more information, visit www.johnadams.co.uk. Available to buy from Amazon: Lolly Maker / Coin Maker.


